🪠 Clogged Nozzles Troubleshooting
Last updated March 30, 2026
As always, please refer to the latest version of the Stardust Operational Manual for the most up to date information
If adjacent pairs of joints come out dry after a Production cycle or a Calibrate Oil cycle, a nozzle may be clogged.
🔎 Common symptom
A clogged nozzle will usually show up as adjacent pairs of joints coming out dry after a Production or Calibrate Oil cycle, rather than a normal, even application. If you notice that the same joints are coming out spotty/patchy/inconsistent it is possible that a nozzle could be clogged
💨 Step 1: Steam clean first for glue
[Glue Only] If you are running glue, first use a water steamer to thoroughly rinse the Spray Manifold and remove any hardened glue buildup. After thoroughly steaming the nozzles, check to see if the issue persist. If it does, the continue to the next step.
🪡 Step 2: Clear the nozzle with the poking needle
Using the Nozzle Poking Needle Set from the customer kit, poke the center hole of the nozzle from the outside, then run a Purge to try to clear the clog. Check to see if the issue persist. If it does, the continue to the next step.
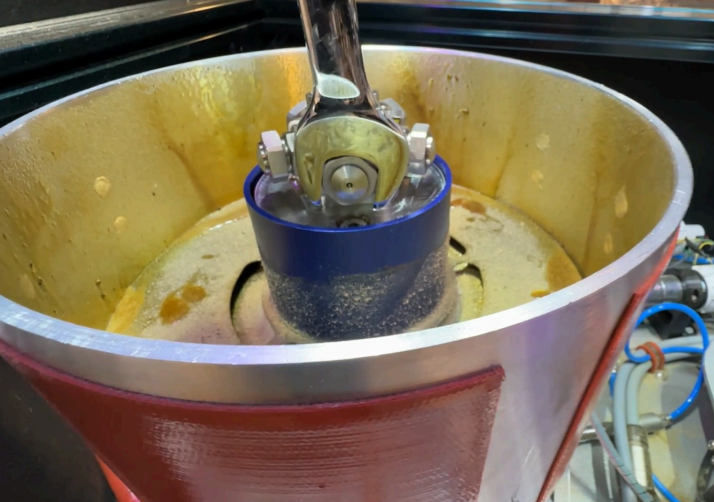
🔧 Step 3: Remove the nozzle if the clog remains
If purging and poking do not fix the issue, remove the nozzle for cleaning using a ⅞” wrench.
♨️ Step 4: Soak the nozzle sub-assembly
Place the Nozzle sub-assembly into hot IPA (concentrate) or boiling water (glue) to dislodge the clog.
Do NOT disassemble the nozzle further.
🚿 Step 5: Rinse and purge the manifold with the nozzle removed
Rinse the Spray Manifold with IPA or hot water, then purge the Spray Manifold with the nozzle removed. Cover the Dipping Station so it stays dry during this step.
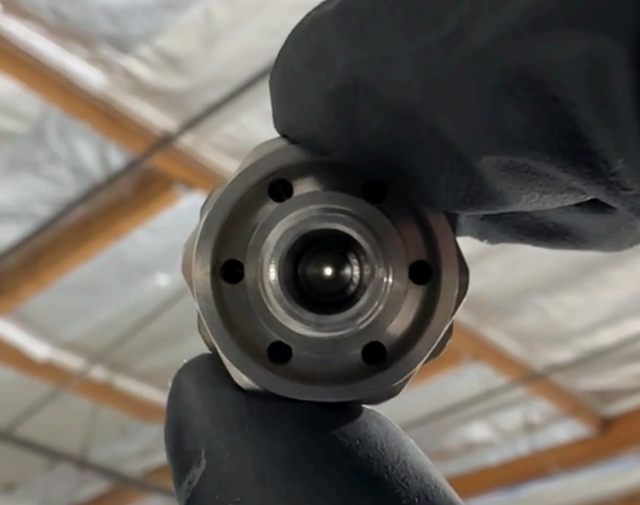
💨 Step 6: Blow air backward through the nozzle
Use the blow gun to blow air backwards through the nozzle until the small orifice can clearly be seen in the light.
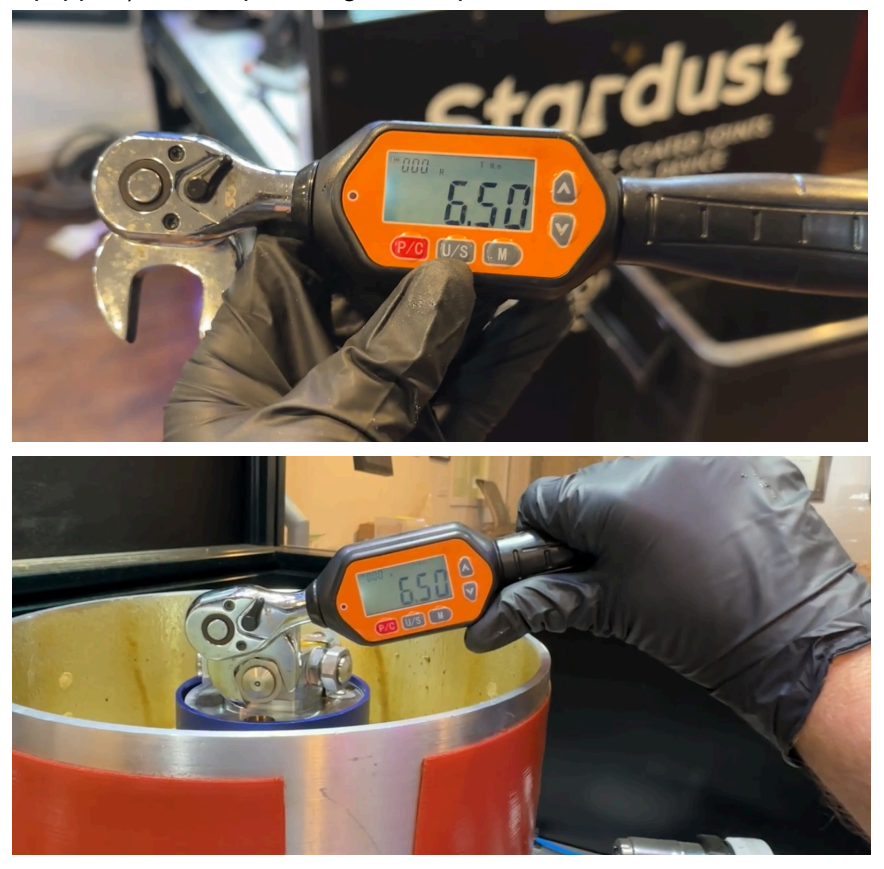
🔁 Step 7: Replace the gasket and reinstall the nozzle
Discard the old gasket and install a new one. Reinstall the nozzle, and nozzle insert if equipped, then torque it using the Nozzle Torque Wrench set to 6.5 N·m. Re-torque three times.
📌 Important cleaning note for glue
Glue is best cleaned with hot water and cleaning glue with alcohol can harden it further. We recommend to do periodic hot water steaming of the Spray Manifold during production if glue buildup is forming.
If the above steps do not work, there may be a larger contaminant in the system
❗Please feel free to reach out to the Sorting Robotics Support Team for any questions if you have already done the above steps without any significant results before proceeding
If the nozzle itself has been fully cleaned and you are still seeing weak or inconsistent flow, there may be a larger contaminant somewhere upstream in the tank, filter, transfer line, or manifold. In that case, the best next step is a more thorough clean-out and hot water purge.
1️⃣ Fully clean and inspect the troublesome nozzles
Start by completing the full nozzle-cleaning procedure above. That ensures you are not chasing a line issue when the problem is still in the nozzle itself.
2️⃣ Fully clean the material tank and inspect for contamination
Open the Material Tank carefully, keeping debris out of the tank, and inspect the bottom of the tank for any particulate or contamination.
3️⃣ Check the material tank filter
Inspect the Material Tank Filter for buildup or trapped particulate that could be contributing to clogs further down the line.
4️⃣ Purge the spray station with hot water — without the nozzles installed first
For glue cleaning, ffill the reservoir with 500 mL of hot water, re-pressurize, drain 100 mL from the drain spout, and then purge the Spray Manifold at 50 kPa with Spray Air OFF for 30 seconds after water begins to flow smoothly from all nozzles. Higher pressures may be needed for thicker glues. As an added troubleshooting step, doing this first without the nozzles installed can help push out any larger contaminant in the lines before it gets lodged in the nozzle again.
5️⃣ Repeat the hot water purge a few times
If you suspect contamination in the line, repeat the hot water purge several times. For deeper glue cleaning, the manual’s weekly cleaning section also references purging 2 liters of boiling water through the Material Tank, Transfer Line, and Manifold until the water runs clean.
6️⃣ Reinstall the nozzles and purge again with hot water
After purging without the nozzles, reinstall the cleaned nozzles with fresh gaskets, torque them correctly, and run several more hot water purges. This helps confirm whether flow has normalized once the nozzles are back in place.
Watch the water streams carefully!
During a water purge, the streams should look smooth and steady. If one stream is weak, intermittent, or visibly different from the others, that is a strong sign that a clog may still be present.
Refer to the following video to how the streams should look during the purge:
8️⃣ Record a video and send it to support
After the final hot water purge, record a video of the water streams coming from the nozzles and send it to support. Comparing the continuity and consistency of the streams can help identify whether there is still a partial clog or an upstream flow issue.
✅ Summary
In most cases, clogged nozzles can be resolved by:
- steam cleaning the manifold for glue
- poking and purging the nozzle
- removing and soaking the nozzle sub-assembly
- purging the manifold with the nozzle removed
- reinstalling with a fresh gasket and proper torque
If that does not solve it, shift focus to a larger contaminant in the system by cleaning the tank, checking the filter, and doing repeated hot water purges, ideally starting without the nozzles installed.